
Yay Hobbitses! My first step-by-step drawing tutorial! Sorry I haven’t posted in such a loooong time😬 I’ve been having internet problems.
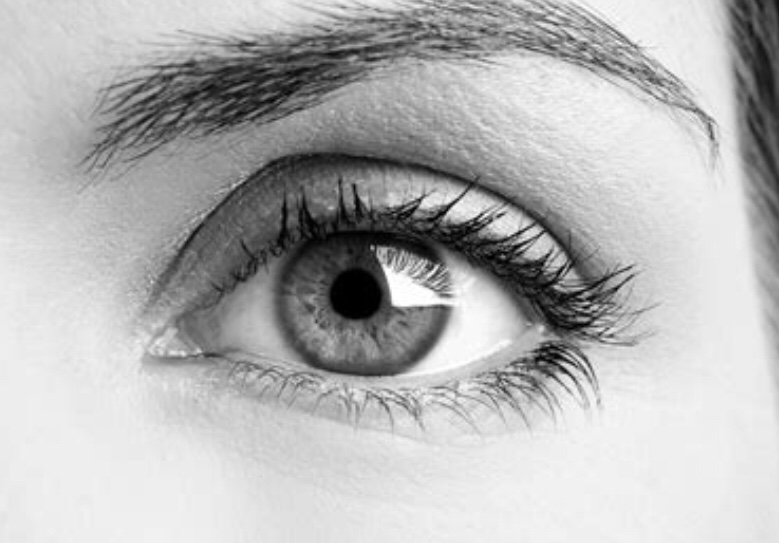
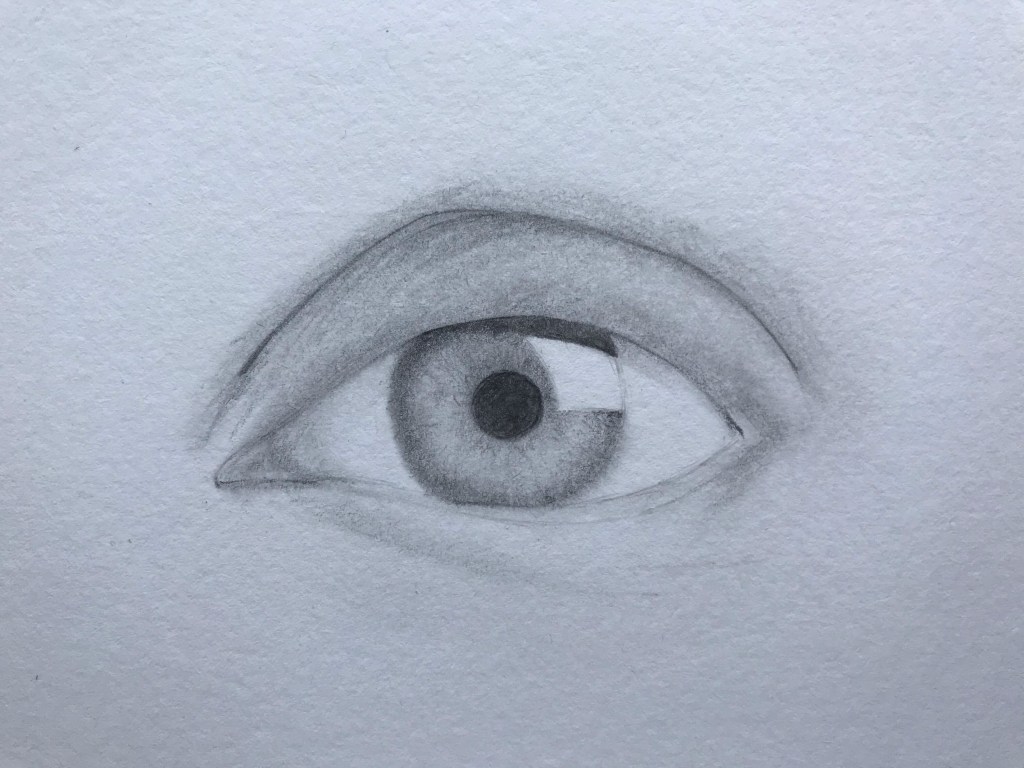
Anyways, I decided to draw an eye because people think I’m good at them :). But I’m NOT a professional; I’m mostly self taught. I hope this tutorial is helpful! The reference photo I’ll be using is the one above. Ok, now let’s dive in!
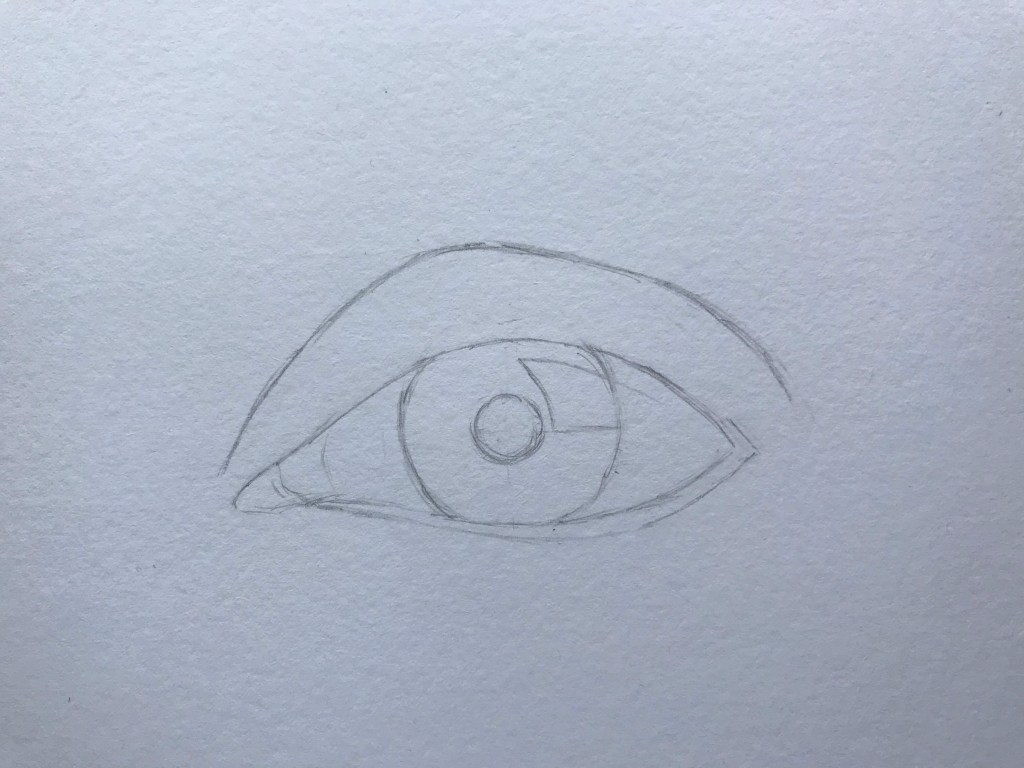
STEP 1: THE OUTLINE
This step is pretty basic. It’s helpful to use a circle template for the circles of the iris and pupil, but I lost mine so I had to be as accurate as possible just eyeballing it. Haha no pun intended. For proportional accuracy, I like to compare parts of the eye —like the width versus the length— for guidelines. Nope! No eyelashes yet! Those come after we do some shading. Tip: remember to draw lightly!
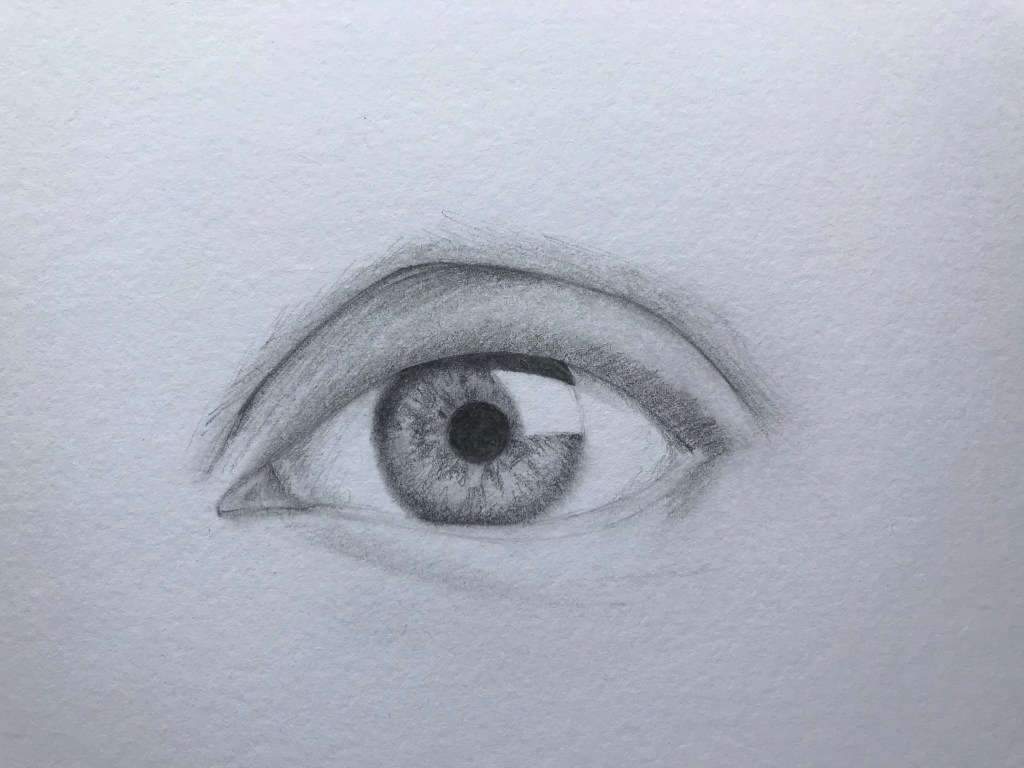
STEP 2: ROUGH SHADING
Use a soft leaded pencil (I used an 8B) to color in the pupil and shade the darker areas. If you make the shading too rough, it won’t blend as nice.
STEP 3: BLENDING
Blend your drawing using a blending stump, q-tip, or tissue using circular motions. Make sure everything is smooth.
STEP 4: MORE PENCIL SHADING
Darken the areas that need darkened or defined with pencils (I used 2B and 8B).
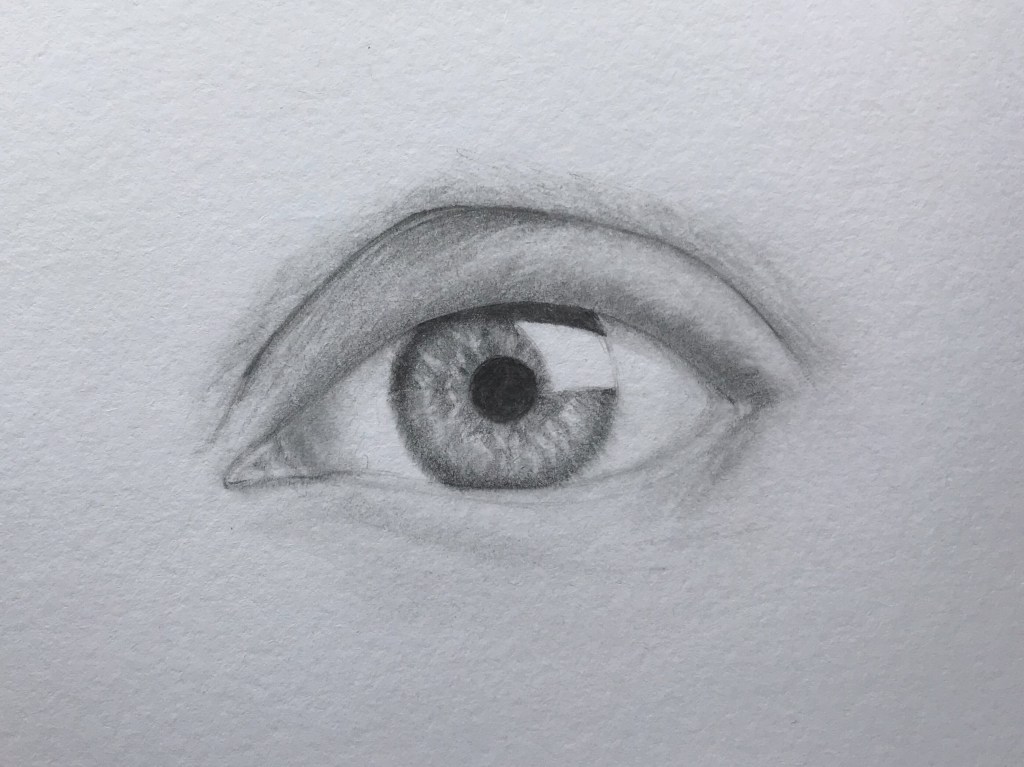
STEP 5: KNEADED ERASER
Use a kneaded eraser, or an eraser with a thin edge, to lighten areas in the iris and tear duct. Also do more shading and blending if you need to. Make sure your outline isn’t too heavily defined, so that your drawing looks more 3D.
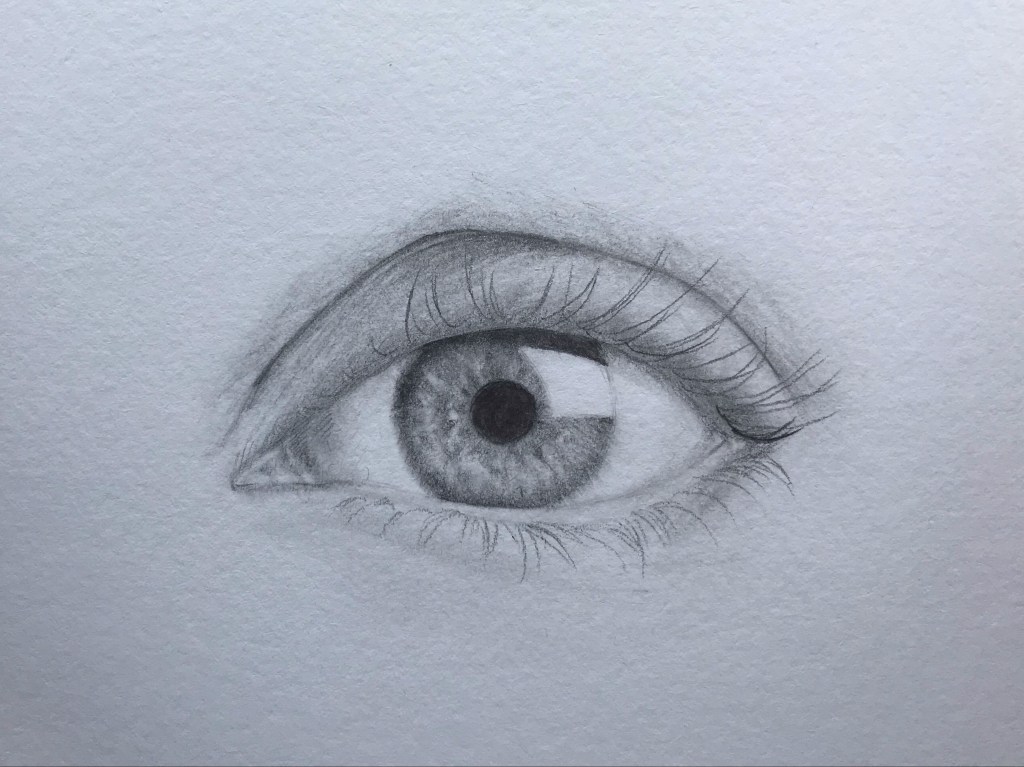
STEP 6: EYELASH BEGINNINGS
Before you make your bold, dark strokes that define the eyelashes, lightly outline their direction, curves, and where you want them to be.
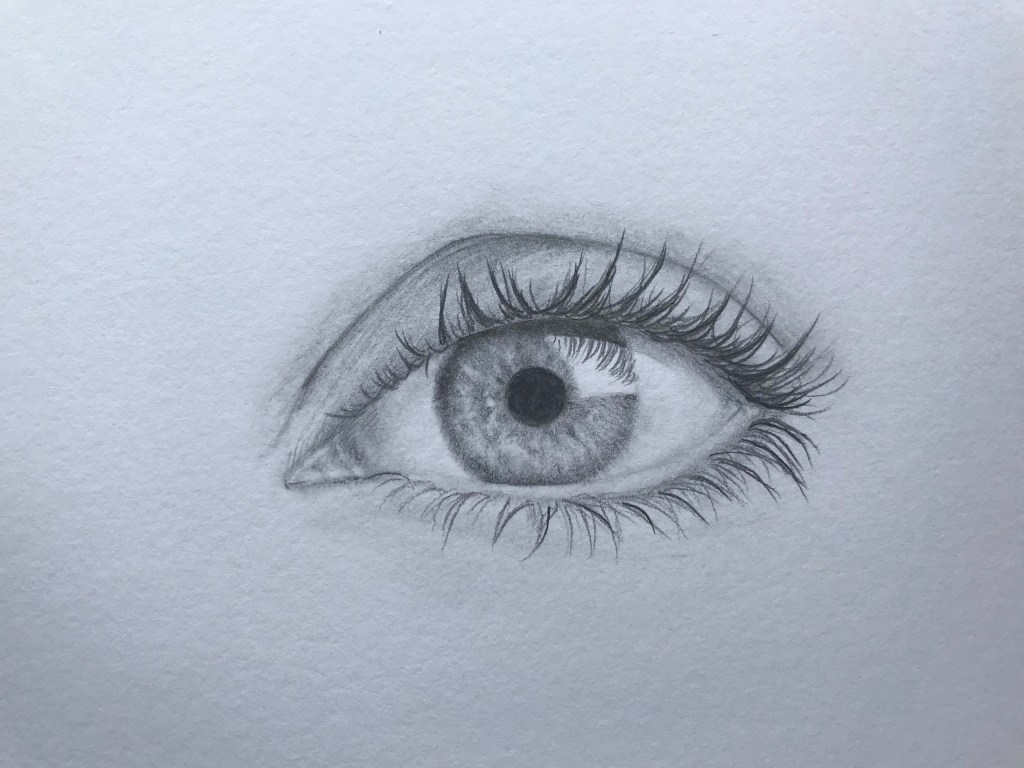
STEP 7: EYELASHES!
Following your light guidelines, use a dark pencil to draw in the eyelashes. Begin your strokes at the base of the eyelash and swoop out, lifting your pencil at the end to make a neat point. Also ad the eyelashes’ reflections on the eye.

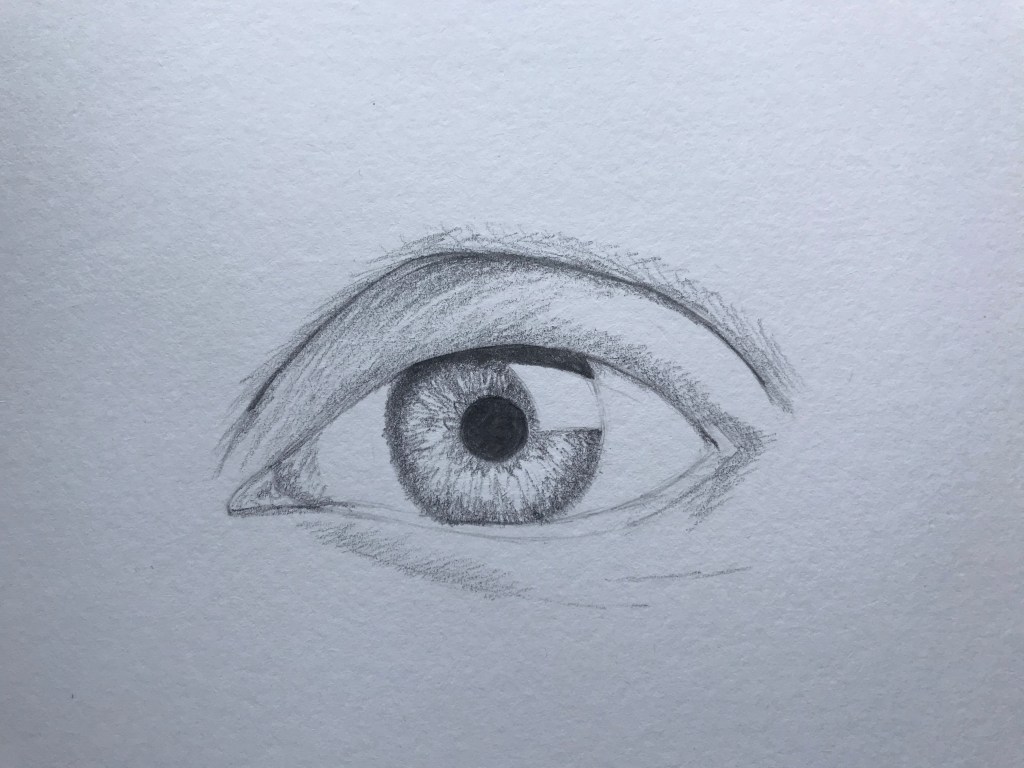
STEP 8: FINISHING TOUCHES
Comparing your drawing to the reference photo (as you should have been doing frequently during the whole drawing process), make any adjustments to make your eye look more lifelike. A softening of a rough edge with a tortillion here, the defining of a highlight with a kneaded eraser there, etc. When you’re satisfied, sign your name!
Well Hobbitses, hope you have fun drawing your eyes😄 If you had trouble, just remember practice makes perfect! Toodle pip!

Wow, that…that is an impressive drawing, and great tutorial! Can’t wait to try it out. Thanks Emma!
LikeLiked by 1 person
Thanks Lilly!
LikeLike
That looks AWESOME! Excellent tutorial, I’ll definitely have to try it out when I get the chance. 😉 Thanks Emma!
LikeLiked by 1 person
Thank you! I hope it proves helpful 🙂
LikeLike
This looks awesome! Great job 💖
LikeLike
Thank you so much!
LikeLike